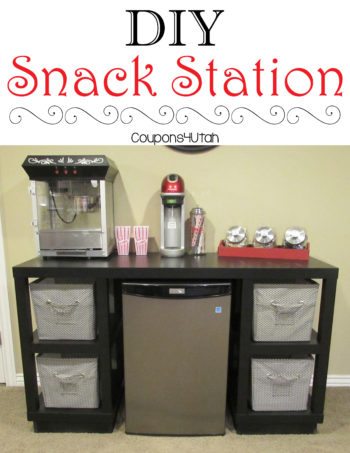
I can't wait to show you my fun DIY Snack Station project today! It's quick, inexpensive, functional and can save you thousands over building a kitchenette in your basement. Our basement family room is a movie/game room. It's where the kids like to hang out with their friends and where we watch movies and play games as a family.
I have wished we had a small kitchen in the basement for years. I mostly wanted a place to put the popcorn machine and some snacks or pizzas when we have friends over or a movie night.
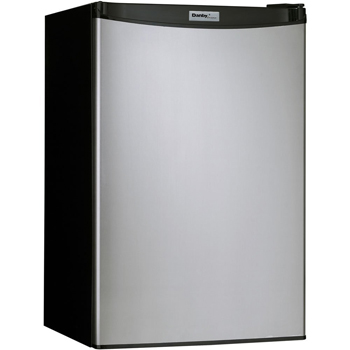
I had been unsure of how to get the counter space I wanted and some storage without spending a lot of money, so I put it off. Then we ended up getting this new mini fridge for free (thanks to our main fridge that is under warranty dying). Now I had all the components of a great snack bar but I needed to find something that would house all of it.
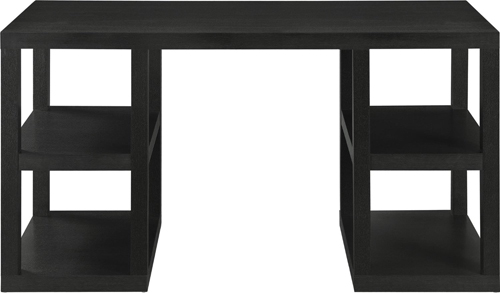
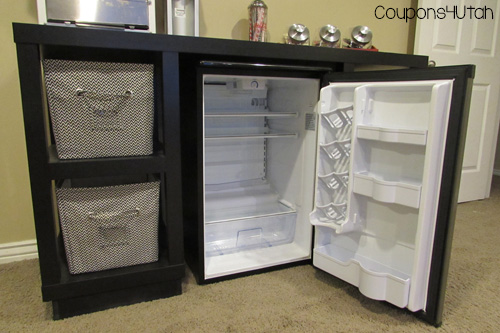
I wanted something that would make the mini fridge look “built in” but wouldn't cost an arm and a leg. That's when I had the idea to use a desk. So I set out to find a desk that had was both wide and deep as well as would fit my mini fridge where a chair would normally sit. I finally found this Altra Parsons Deluxe Desk in black on Amazon. Right now it's only $79.00!! (I paid more for the same desk, this is a great price!)
It had the depth and length I wanted (more than most other desks I looked at) and it would ALMOST fit my mini fridge. My mini fridge is one of the largest on the market, so it was tough finding a chair opening wide enough and tall enough. This was wide enough but was lacking 1″ in height. I knew it would be close, but I also knew we could probably make it work. So we ordered the desk and put it together.
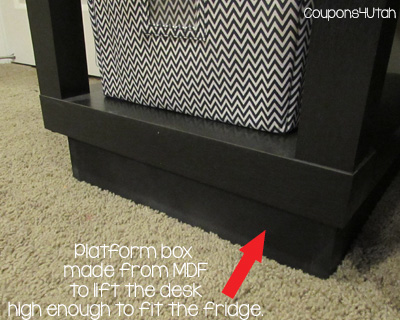
Sure enough, the dimensions were accurate and the fridge was an inch too tall to fit in the opening. So, my wonderful husband cut some MDF into 2″ strips and made a box out of them that would fit under the desk leg to lift it up. We painted them black to match the desk, attached them with wood glue and voila! Our snack station was complete in just a couple of hours.
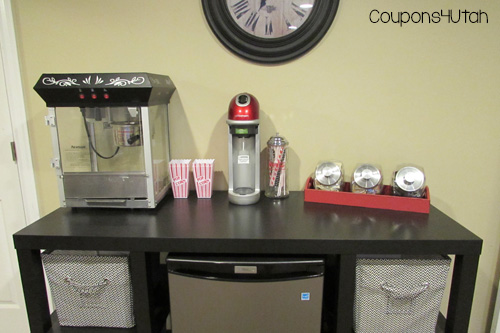
I found most of the accessories at Walmart. These chevron fabric bins are great storage for paper towels, paper plates, popcorn packets, flavorings, straws and such. They were under $10 each at Walmart and fit great.
I hope this gives you some inspiration for your own snack bar. We are loving and using ours a lot this summer!



 Shawnee says
June 17, 2018 at 8:15 amAbsolutely love this! Can’t wait to make it. Thanks for sharing.
 Coupons4Utah says
June 28, 2018 at 5:35 amGreat! Hope you enjoy yours as much as we enjoy ours!
 Amber says
June 15, 2017 at 12:10 amHow did you husband make the platform??
 Christina says
June 16, 2017 at 3:48 pmIt is just 4 boards, glued and then screwed together. I believe we used 3″x1″ boards to make ours the correct height for our fridge. Also, the platforms are 16″ across the front and back and 19″ on each side. Hope that helps!
 Chrissy says
March 13, 2017 at 11:01 amWhat is the machine in the middle on the desk?
THANKS!!!
 Coupons4Utah says
March 14, 2017 at 3:21 pmIt’s a milkshake maker, much like this one on Amazon
—>>http://amzn.to/2n7qjYR
 Karen says
March 24, 2017 at 3:27 pmCan you share a link to the fridge you got?!
 Joani says
March 25, 2017 at 12:04 amHi Karen, Sorry about that. I’ve updated the post with the links to all the products. Come back and let us know how it turns out.
 Karen Drummond says
February 28, 2017 at 2:14 pmLove this idea!! Been looking all over Pinterest for a snack bar for our bonus room. Can you share the link to the mini fridge you bought? Thanks!
 Abby says
October 26, 2016 at 1:03 pmI LOVE THIS!!!! Thanks for sharing and the link to the desk. I have been trying to figure out how to use a cheap mini-fridge and make it look built in while still having air be able to circulate around the fridge. Also I wanted a counter big enough for a microwave and coffee maker. This is PERFECT! I’m so glad you made it and shared how! You made my day!