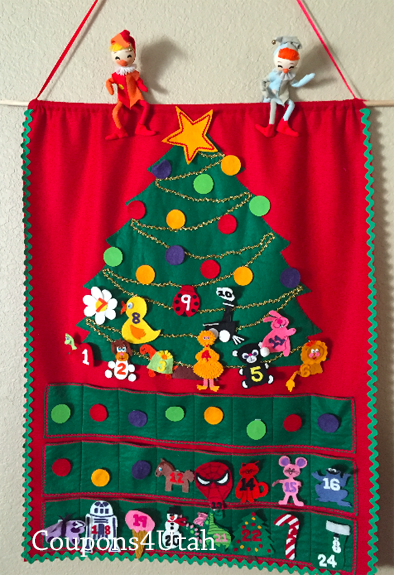
When I was a kid my mom was very good at making Christmas special. Growing up we didn't have a surplus of money. Dad was a teacher and Mom stayed at home. While we weren't poor, my family lived a frugal lifestyle. Mom always seemed to light up Christmas with crafty ideas and special traditions. We had elves reeking havoc on the house all the way back in 1972. Those pictured below are actually our families original elves. They were hand me downs from a Christmas decoration of my Grandmothers. My guess is these little guys have been decorating the mantles of our homes for about 65 years.
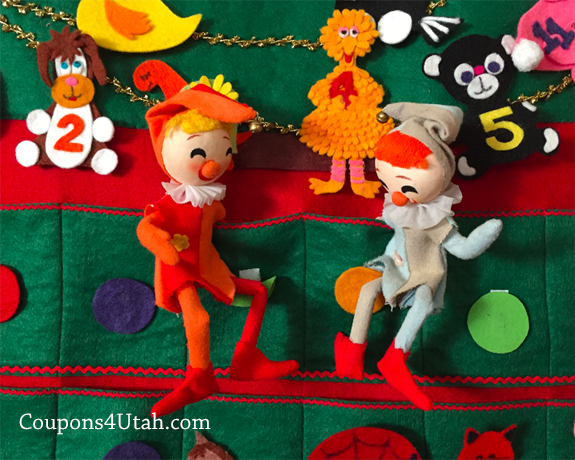
Our elves hung around a Christmas countdown calendar my mom made from felt scraps. Each night they would come to life and bring a little candy or a small toy, like pencils, little figure toys and such. They would leave them in the calendars pockets. On days when we were especially good, the elves would hide a small wrapped gift. We would have to hunt for our elf where we would usually find him positioned upside down or some other kind of silly pose. It was a magical time for us.
Years later, when the elf on the shelf made it's debut, my mom kicked herself for not thinking to market her calendar idea. I remember her saying “who was spying on her and stealing her ideas?”. Now three generations later, this calendar tradition has been carried on to each of our families with duplicated calendars my mother and I made for the grand-kids and great-grand kids.
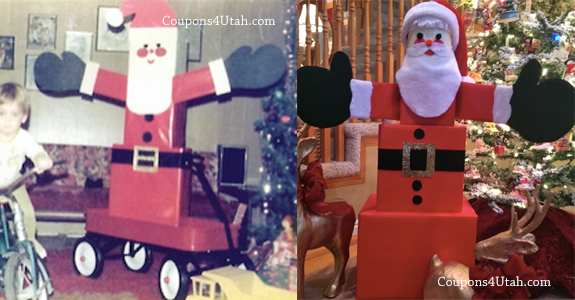
My mom also loved to wrap our presents with a creative touch. This “Santa in the Box” styled after Jack, was one of her favorites. Inside each box was another wrapped gift. By doing this, my mom was able to stretch out the anticipation and make a small gift a much bigger ta da. I actually recreated it this year for my grand kids to find on Christmas morning and thought I'd share how it's done.
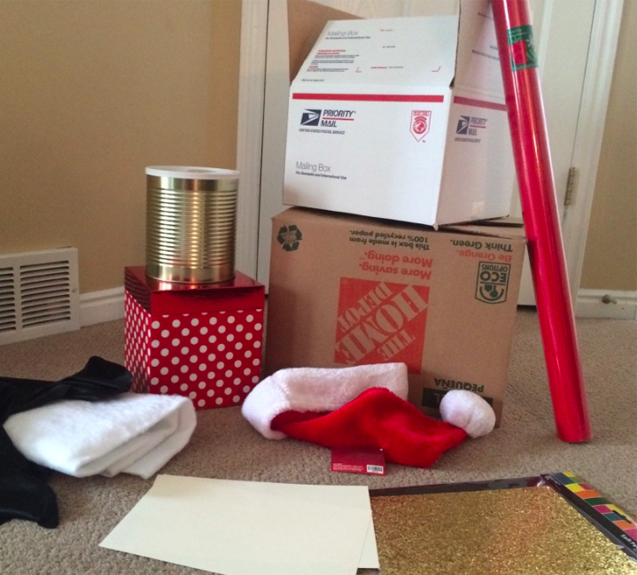
The items I used I either had around the house or picked up at my local craft store (list of craft store coupons here). Remember, that the kids are going to rip into it, so try and use what you have. The head and arms can keep for use year after year.
Body – 3 boxes that stack (my boxes were a .75¢ Home Depot moving box, a free Priority USPS box and a gift box I happened to have hanging around). You'll also need a piece of cardboard for the arms that is about 2 1/2 feet long.
Head and Face – A coffee can or another smaller box will also work. 2 sheets of flesh colored scrapbook paper. (you could also use craft paper from the $1.00 store). white quilters batting or thick white felt (about 1/3 yd). Red felt scrap or construction paper for the mouth, pink felt scrap or construction paper for the cheeks, black felt scrap for the eyes (I used black pom-poms I had laying around for mine).
Clothes – A roll of read wrapping paper, a Santa hat, 2 to 3 inch wide black ribbon or black felt or fabric for the belt (long enough to fit around your middle box), self sticking black felt for the gloves and buttons, glitter gold felt for the belt buckle, white quilters batting or thick white felt for the fur around Santa's gloves. (you can purchase this by the yard at the fabric store).
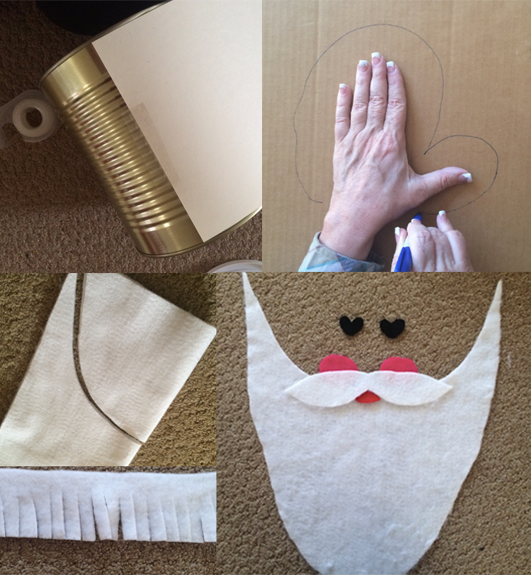
1- On the flat piece of cardboard cut the arms and hands. I just used my own hand as a guide for cutting out the shape of the mittens and then used a straight edge for the arms.
2 -Place the gifts you want inside the boxes and wrap the boxes and Santa's arms red. Be careful when doing the arms to make sure you get a left and right arm.
3 – Wrap the face with the flesh colored paper.
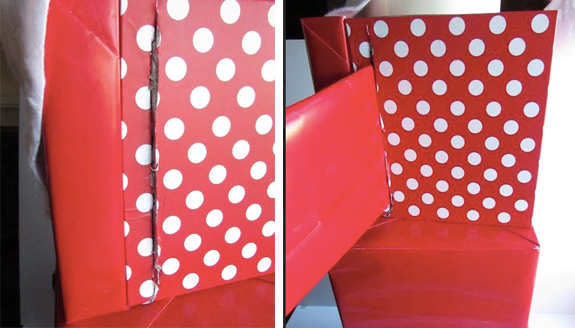
4- Cut a slit on each side of the box where Santa's arms will go. The arms simply slide into the box. Since I used a pre-wrapped polka dotted gift box, I just left it unwrapped and only covered the lid with red paper. How you wrap yours will depend on the boxes you use.
5 – Cover the mittens with the sticky black felt on each side. Leave enough of the edges of the felt to cover the edges of the cardboard and stick together. This creates a stitched look as well as hiding the edges of the cardboard. Cut a strip of the white batting or felt and glue it around the arm between the sleeve and Santa's mitten. I found that Tacky Glue works best.
6- For the beard, since each box or can will be a different size, you'll have to free hand the beard. I cut a kind of half circle out for mine for where the face goes and then shaped the curved on the bottom. Cut him a mustache, round cheeks, nose, mouth and eyes. Attached them to the head.
7- Cut a 2 inch strip of batting or felt long enough to wrap around the head and trim the hair (I doubled mine). Attach to the top of the head.
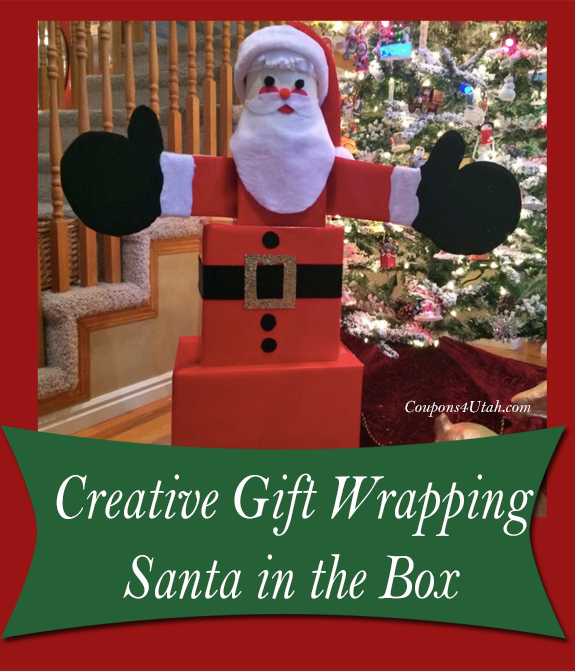
8- Stack the boxes and find Santa's waist. Wrap the ribbon around Santa's waste and cut out a square belt buckle and glue on. Glue on round black felt for buttons. Insert his arms and prop the hat on his head and you are done. You can hide your boxes away and assemble this quickly on the big night.
Check out this post here for more great ideas for wrapping gifts.
Joani's notes: This post comes on the 1 year anniversary of my mother's passing, December 14, 2014. It is shared as a tribute to her. Thanks Mom~

 Connie says
December 14, 2015 at 11:02 pmWhat a lovely tribute to your mom. I too, always did elves with my kids. We didn’t have a calendar, but they were always watching and would bring small gifts and treasures, to reward good behavior.
 Joani says
December 15, 2015 at 9:05 amThat’s a sweet tradition. Gotta love those little “non-creepy” elves. 🙂