This is a guest post from my daughter, who is living in Italy right now. I've asked her to start bringing you news from Italy. We hope to have her sharing frugal ideas for travel, places to see and some of the restaurants. I'll be calling these post “Frugal Ramblings from Italy”.
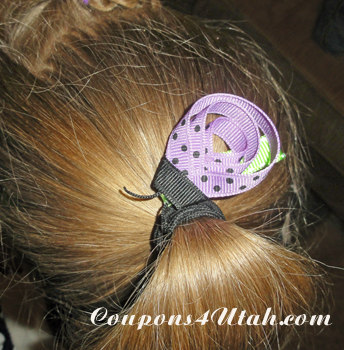
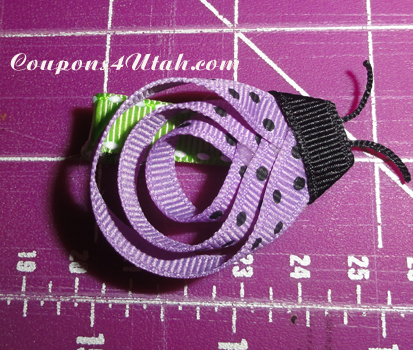
She is starting out by passing on along a crafty idea. These little Lady Bug Hair Clippies are easy and fun for everyone to make and cost very little. I think they would make a great little stocking stuffer.
Have you ever seen these adorable ribbon sculpture clippies? They are so cute!
My mom, Joani, started making them for my daughter when she was born and I instantly fell in love with them and had to learn myself. I am now a clippie making maniac making them for all the little girls out here in Italy. So here is how to make this adorable Ladybug.
What you will need:
-Glue Gun (or E6000 adhesive)
-Scissors
-Ruler
-Lighter to heat seal ends of ribbon
-1 3/4 in. alligator clip – these can be found at pretty much any craft store
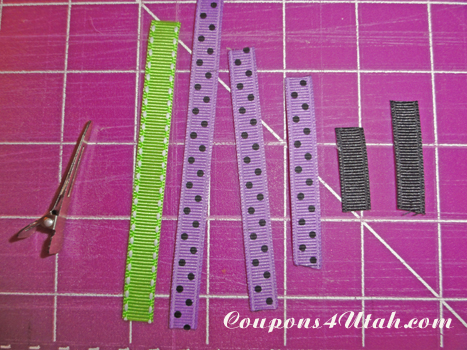
– (1) 4 in. piece of 3/8 in. ribbon (I chose green) to cover clip
– (1) 10 1/2 in. piece of 3/8 in. ribbon (I chose purple) for body
– (1) 2 1/2 in. piece of 3/8 in. ribbon (I chose black) for antenna and face
Step 1:
Measure and cut the ribbon you chose for the body into 3 pieces: (1) 4 1/2 in. (1) 3 1/2 in. and (1) 2 1/2 in. Measure and cut the piece you chose for the body and antenna into two pieces: (1) 1 in. and (1) 1 1/2 in. piece. Heat seal the ends of the pieces so they do not fray.
Step 2:
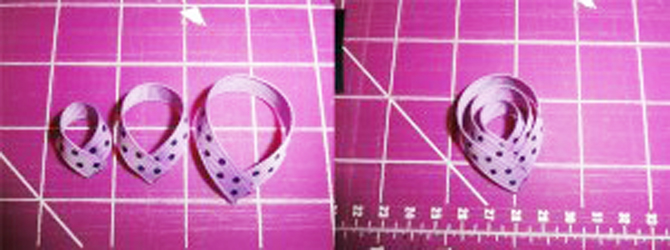
Now that the body pieces have been cut, take one of the pieces, and cross the ends over each other and glue them together. Do this for each of the body pieces. They should look like the first picture. Once you have them glued, you want to start with the smallest piece and glue it underneath the middle piece, staggering it just a little. Then add that to the largest piece. It should look like the second picture.
(Enlarge photo 1 Enlarge photo 2)
Step 3:
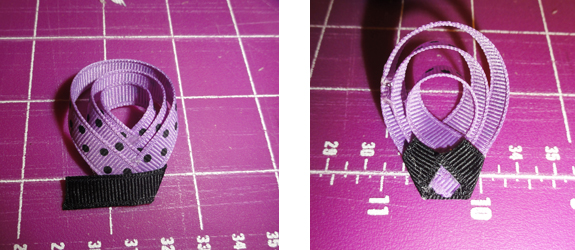
To add the face, take the 1 1/2 in. piece of the color you chose for the face and glue it centering the ribbon on the body with the edge to tip. Turn the ends under and glue them down so that there is a flat edge on the front.
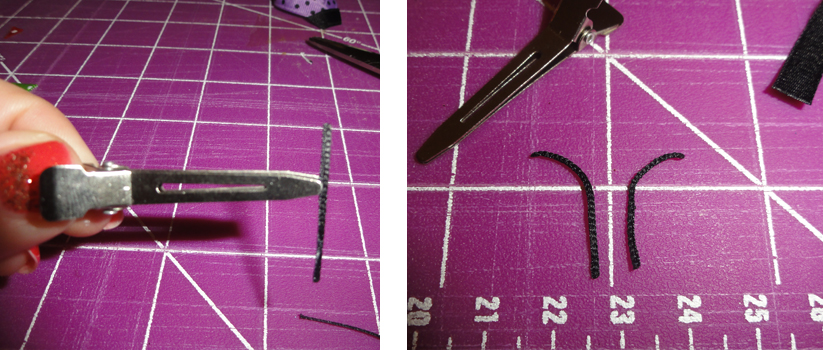
To make the antenna, cut the edges off of the 1 in. ribbon, the thickness is your preference, just make sure you do not cut too much off because it will fray. Heat seal the edge that you cut.
To make them curl, use the alligator clip to hold the piece and carefully apply heat near the center of the piece. It should automatically start to curl. THIS IS THE HARDEST PART and took me a few times to get it right, so it is best to have a few scraps to practice on. Glue the antenna to the underside of the bug face so that they curve out. Now your bug is complete.
Step 4:
To cover the clip, heat seal the ends of the 4 in. piece of color you chose for the clip. Add about an inch of glue to along the length of one end of the ribbon. Open the mouth of the clip and place the the ribbon (glue side up) into the mouth and clip down. Now add glue along the top of the clip and fold the ribbon over and press down. Then flip the clip completely over, add a small dab of glue to the underside and wrap the rest of the ribbon around. Now all you have to do is glue your bug to your clip.
On a side note, if the clip is slipping out of the hair, there are two ways to make it non-slip, one is by taking some silicone and spread a small amount on the inside of the clip on the ribbon or you can use the non-slip shelf liner, cutting a small piece that will fit to the size of the ribbon and gluing it to the clip. Both methods work really well.



 Annalisa says
November 6, 2012 at 1:56 pmSo cute, I love this! You can also use a small piece of velcro to help the clip not slip (the scratchy side of velcro). Works like a charm!